Windows 8 Keyboard Shortcuts ( complete list )

1

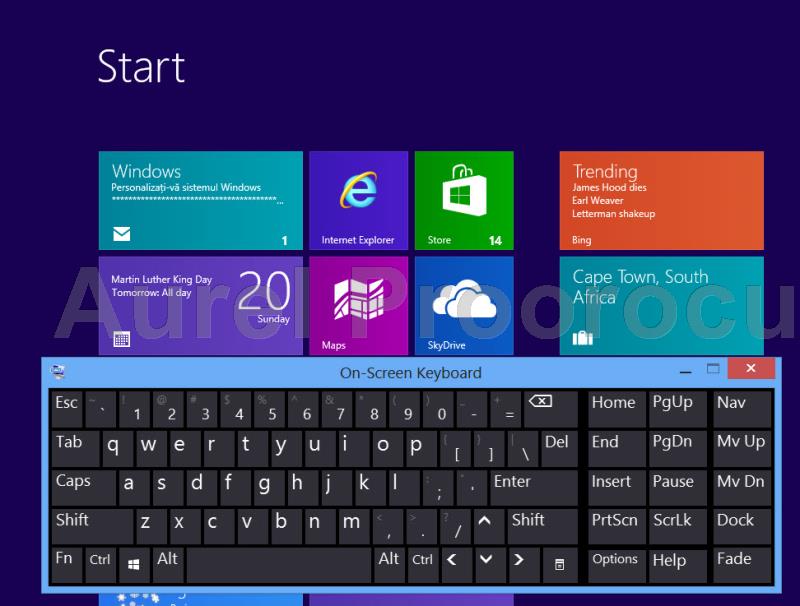
New Windows 8 Keyboard Shortcuts

Win – Display Start Menu
Win + Mouse Scroll Wheel – Zoom in and out on the Start Menu
Win + L – Lock your PC and return to logon screen
Win + P -Projector Options
Win + X – Admin tools menuWin + Enter – Starts Windows Narrator
Win + (plus sign + ) – Screen zoom in
Win + (minus sign – ) – Screen zoom out
Win + Print Screen – Saves a screenshot in the picture library screenshot folder
Print Screen – Saves a  screenshot to clipboard
Alt + Tab – Classic app switcher
Win + Tab – Metro app switcher
Alt + F4 – Close application (Desktop and Metro)
Tab – Select different items
Ctrl + C – Copy
Ctrl + X – Cut
Ctrl + V – Paste

New interface shortcuts
Win + C – Displays charms
Win + Z – Displays app bar
Win + I – Settings side menu
Win + K – Devices menu
Win + H – Share menu
Win + F – File search
Win + Q – Application search
Win + W – Settings search
Win + (period . ) – Snap Metro app to the right
Win + Shift + (period . ) –Snap Metro app to the left
Arrow keys + spacebar – Select app tile

Shortcuts for desktop
Win + D – Show Desktop
Win + M – Minimize to Desktop
Win + R – Run
Win + T – Taskbar previews
Win + U – Ease of Access Center
Win + Pause / Break – System Information
Win + comma – Peek at desktop
Ctrl + Shift + Escape – Task Manager
Win + Right Arrow – Aero snap right
Win + Left Arrow – Aero snap left
Win + Up Arrow – Aero snap full screen
Win + 1 through 9 – Launched applications pinned to the taskbar

Shortcuts for File Explorer
Win + E – Open File Explorer
Ctrl + N – Additonal File Explorer window
Alt + F + P – Open Command prompt at current location
Alt + F + r – Open PowerShell prompt at current location
Ctrl + Mouse Scroll Wheel – Change view
Ctrl + Shift + N – New Folder
Alt + Enter – Selected File/Folder Properties
F2 – Rename selected item
Ctrl + F1 – Show or Hide Ribbon
Alt + Up arrow – Navigate up a folder
Alt + Left Arrow – Navigate to previous folder
Alt + Right Arrow – Navigate forward

Shortcuts for Internet Explorer 10
Ctrl + B – Favorites Manager
Ctrl + D – Add site to Favorites
Ctrl + I – Favorites List
Ctrl + G – Feeds
Ctrl + H – History
Ctrl + J – View Downloads
Ctrl + N – New Window
Ctrl + P – Print
Ctrl + Shift + P – Open InPrivate mode tab
Ctrl + T – New tab
Ctrl + K – Duplicate tab
Ctrl + W – Close tab
Ctrl + Shift + T – Reopen closed tab
Ctrl + Tab – Switch between open tabs
Ctrl + R or F5 – Refresh Page
Ctrl + U – View Source
Ctrl + F or F3 – Find on page
Ctrl + E – Move cursor to address bar to search the web
Alt + Home – Homepage
Alt + Left Arrow – Back
Alt + Right Arrow – Forward
F10 – Menubar
F11 – Toggle Full Screen Mode
F12 – Developer Tools

Shortcuts for Internet Explorer 10 Metro
Ctrl + E – Move cursor to address bar to search the web
Ctrl + F or F3 – Find on page
Ctrl + R or F5 – Refresh Page
Ctrl + P – Print
Ctrl + T – New tab
Ctrl + K – Duplicate tab
Ctrl + W – Close tab
Ctrl + Tab – Switch between open tabs
Ctrl + Shift + T – Reopen closed tab
Ctrl + Shift + P – Open InPrivate Mode Tab
Ctrl + L or F4 – Open address bar
Alt + Left Arrow – Back
Alt + Right Arrow Forward
The pretty nice list can be found here: download a PDF or XPS

How to activate Windows 8 Enterprise

How to activate Windows 8 Enterprise ? 

1. Press Start button ( from the keyboard ) / and type cmd :
1

2. Select the Command Prompt and click on the Run as an administrator :
2
3. Type: slmgr.vbs -ipk “WINDOWS-8-ACTIVATION-KEY” 
*Replace “WINDOWS-8-ACTIVATION-KEY” with your Serial Number 
3
If you have problems don’t hesitate to comment / contact me. 

Enjoy !

Blog is back online / Hosting problems

Because of some serious problems with the hosting provider I had to move the blog, and took it offline for a few months to move it to another host. 

Thanks BlueHost for support. Really a super professional hosting company. 
logo

Thank you all for the support & in the next days I am going to upload new materials with Windows 8 / Exchange server 2013  & other interesting things. 

HowTo Whitelist a domain or email address in Microsoft Exchange 2010

exchange-2010-logo-e1344444075384

First of all, what is a whitelist ?
A whitelist is a list of known safe email senders.  Whitelists can be made up of IP addresses, domain names, or email addresses.  In most cases businesses will choose to whitelist domain names of highly trusted customers or suppliers, or email addresses that are the source of critical emails.

Whitelist features are not available via Exchange Management Console (the GUI), so this will have to be completed via the Exchange Powershell Open powershell via the exchange menu item and run one of the following scripts, based on your requirement:

To check whats currently whitelisted (Bypassed Recipients):

Get-ContentFilterConfig

To whitelist a single email address:

$list = (Get-ContentFilterConfig).BypassedSenders

$list.add("new.mail@address.com")

Set-ContentFilterConfig -BypassedSenders $list

To whitelist an entire domain:

$list = (Get-ContentFilterConfig).BypassedSenderDomains

$list.add("domain.com")

Set-ContentFilterConfig -BypassedSenderDomains $list

ENJOY.

And if you encounter any problems feel free to comment contact me.

How to check if standard or enterprise Exchange 2010 is installed?

This thing can be done by using the GUI or by using Powershell.

A. Using GUI

1.Open EMC / Expand untill you get to Server Configuration ( and click on it ) / On the right panel will appear the server configuration:

2. Click on View / Add/Remove Columns

3. In the window that appears click on Edition and the Add / then OK:

4. After that the column with the edition will appear:

B. Using Powershell

1. Open Microsoft Exchange Management Powershell
2. Run the following command:

get-exchangeserver


ENJOY.

And if you encounter any problems feel free to comment contact me.

Forefront Protection 2010 for Exchange Server 2010 | Antispam / Test

First of all why do you need Forefront Protection for Exchange Server ?

Microsoft Forefront Protection 2010 for Exchange Server (FPE) provides fast and effective protection against malware and spam by including multiple scanning engines from industry-leading security partners in a single solution. FPE provides customers with an easy-to-use administration console that includes customizable configuration settings, filtering options, monitoring features and reports, antispam protection, and integration with the Forefront Online Protection for Exchange (FOPE) product. If you have installed FPE on multiple Exchange servers, such as in an enterprise, you can manage them with the Microsoft Forefront Protection Server Management Console (FPSMC). Additionally, you can use Windows PowerShell, a command-line shell and task-based scripting technology that enables the automation of system administration tasks, to administer FPE.

Installing FPE on a Mailbox / Hub Transport Exchange Server

  • During installation you’ll be asked whether or not to enable Antispam, the default will be to not enable it.  That’s what we want, we’ll leave that task to the Edge server.
  • FPE on an internal machine will provide Antivirus and Antimalware protection.  You’ll also be able to run on-demand scans of individual mailboxes if you so choose.

Installing FPE on an Edge Transport Exchange Server

  • This time the default will be to enable Antispam, which is exactly what we want.
  • Edge servers don’t have direct access to any mailboxes, so you can’t run scans on selected objects from here.

Update FPE Spam Definitions and Engines

  • Spam/Virus/Malware definitions should come through Windows update automatically.  Just be sure they’ll install automatically.
  • To update your FPE Engines, browse to your Policy Management -> Global Settings -> Engine Options and choose Update All Engines Now from the options pane.

Send Test Emails

  • To test if Antispam is functioning properly head on over to Gtube.net.  Send a Gtube test from an external domain and you should receive an automatic reply that the mail is undeliverable:#550 5.7.1 Message rejected due to content restrictions ##
  • To test Antivirus/Antimalware, use EICAR.org.  Send the EICAR signature as an attachment from an external domain and you should receive the email, but the attachment will be quarantined.

Solved | A connection couldn’t be made to Exchange server named ‘Exchange_2010′….

This error is quite common in the GUI of Exchange 2010. The first thing you need to do… is:
DO NOT PANIC !

1. Go to Start services.msc

2. Browse for the Microsoft Exchange Service Host / right click on it Restart ( if already started ) or Start ( if it was stopped )

ENJOY.

And if you encounter any problems feel free to comment contact me.

SOLVED | Exchange 2010 | Connecting to remote server failied with the following error message: The WinRM client received an HTTP server error status (500)

One quite common error I faced during the Exchange 2010 era is the WinRM HTTP Error:

If i use the management tools GUI i get an error message saying:
“Connecting to remote server failied with the following error message: The WinRM client received an HTTP server error status (500), but the remove service did not include any other informaition about the cause of the failure. For more information, see the about_Remote_Troubleshooting Help topic. It was running the command ‘Discover-ExchangeServer -UseWIA $true -SuppressError $true’.”

Using the Exchange Management Shell is get a similar error:
Connecting to remote server failied with the following error message: The WinRM client received an HTTP server error status (500), but the remove service did not include any other informaition about the cause of the failure. For more information, see the about_Remote_Troubleshooting Help topic.
+ CategoryInfo : OpenError: (System.Manageme….RemoteRunspace:RemoteRunspace) [], PSRemotingTransportException
+ FullyQualifiedErrorId: PSSessionOpenFailed”

FIRST THING YOU MUST DO: DO NOT PANIC !
DO NOT REBOOT THE SERVER !!!
I WILL EXPLAIN HOW TO SOLVE THIS IN A FEW EASY STEPS:

1. When you open the EMC ( Exchange Management Console ), you will get an error similar to this: 

2. Go to START Administrative Tools / Server Manager / Features Add Features / And check WinRM IIS Extensions / NEXT NEXT CLOSE:
!!! IF YOU ALREADY HAVE THIS ROLE INSTALLED, JUST REINSTALL IT ! 

3.  Close Reopen EMC and it will work like a charm ( NO REBOOT REQUIRED ):

ENJOY.

And if you encounter any problems feel free to comment contact me.

How to Configure Storage Quotas in Exchange 2010 ?

In exchange 2010 the quotas can be either set for the entire ExchangeDB, or per mailbox.
Atention ! If you set a quota on the DB, and then you set a quota on the mailbox, the mailbox setting will override the DB setting.

A. How to set a storage QUOTE for a Exchange Database, using EMC ( Exchange Management Console ):

1. Open the EMC, then expand the Organization Configuration / Mailbox, then go to Database Management tab. After that, right click on the database you want to change the quote to, and selectProperties.

2. In the properties window, go to Limits Tab, and change the Issue warning / Prohibit send / Prohibit send and receive according to your needs. Then click OK, and you`re done.

B. How to set a storage QUOTE for a specific user, using EMC (Exchange Management Console):

1. Open the EMC, then expand the Recipient Configuration / Mailbox, and then click on the desired mailbox you want to change the quote to, and then either right click / Properties or click on propertiesfrom the right menu.

2. In the Properties window go to Mailbox Settings tab, click on Storage Quotas and thenProperties:

3. In the storage quotas window deselect the Use mailbox database defaults, and then set your desired values for Issue Warning / Prohibit send at / Prohibit send and receive at. Then click OK OK. And you`re all set up.

ENJOY.

And if you encounter any problems feel free to comment contact me.

Solved | An error caused a change in the current set of domain controllers – Exchange 2010

One of our administrators was facing some weird errors in the EMC and came to me for support. He showed me the errors bellow, and i knew them because this is quite common in Exchange 2010.
In our case this issue was caused by a recent demotion of a Domain Controller, and however the configuration of Exchange 2010 was updated the errors occurred.

Errors:

An error caused a change in the current set of domain controllers. It was running the command ‘Get-Mailbox – Identity ” -ReadFromDomainController’.
An error caused a change in the current set of domain controllers. It was running the command ‘Get-Recipient -PropertySet ConsoleLargeSet -ResultSize ’1000′ -SortBy DisplayName -RecipientType ‘DynamicDistributionGroup’,’UserMailbox’,’MailContact’,’MailUser’,’MailUniversalDistributionGroup’,’
MailUniversalSecurityGroup’,’MailNonUniversalGroup”.


Solution:

1. Close the EMC
2. Go to c:\users\<the user with problem>\appdata\roaming\microsoft\mmc\ and delete or rename the file Exchange Management Console.
3. After this restart the EMC ( no reboot of the server is necessary ).


ENJOY.

And if you encounter any problems feel free to comment contact me.